0 ARTIKELENBekijk winkelwagen

10jul
Eversolo DMP-A6 Song Transfer Tutorial
DMP-A6 Song Transfer Tutorial
- I. Preparations
- Windowscomputer x1
- M.2 SSD & USB portable hard drive x1
- Prepare several music files on the computer to be transferred to the media player
Friendly reminder: The computer and DMP-A6 need to be on the same local network!
- II. Introduction to Song Transfer Function
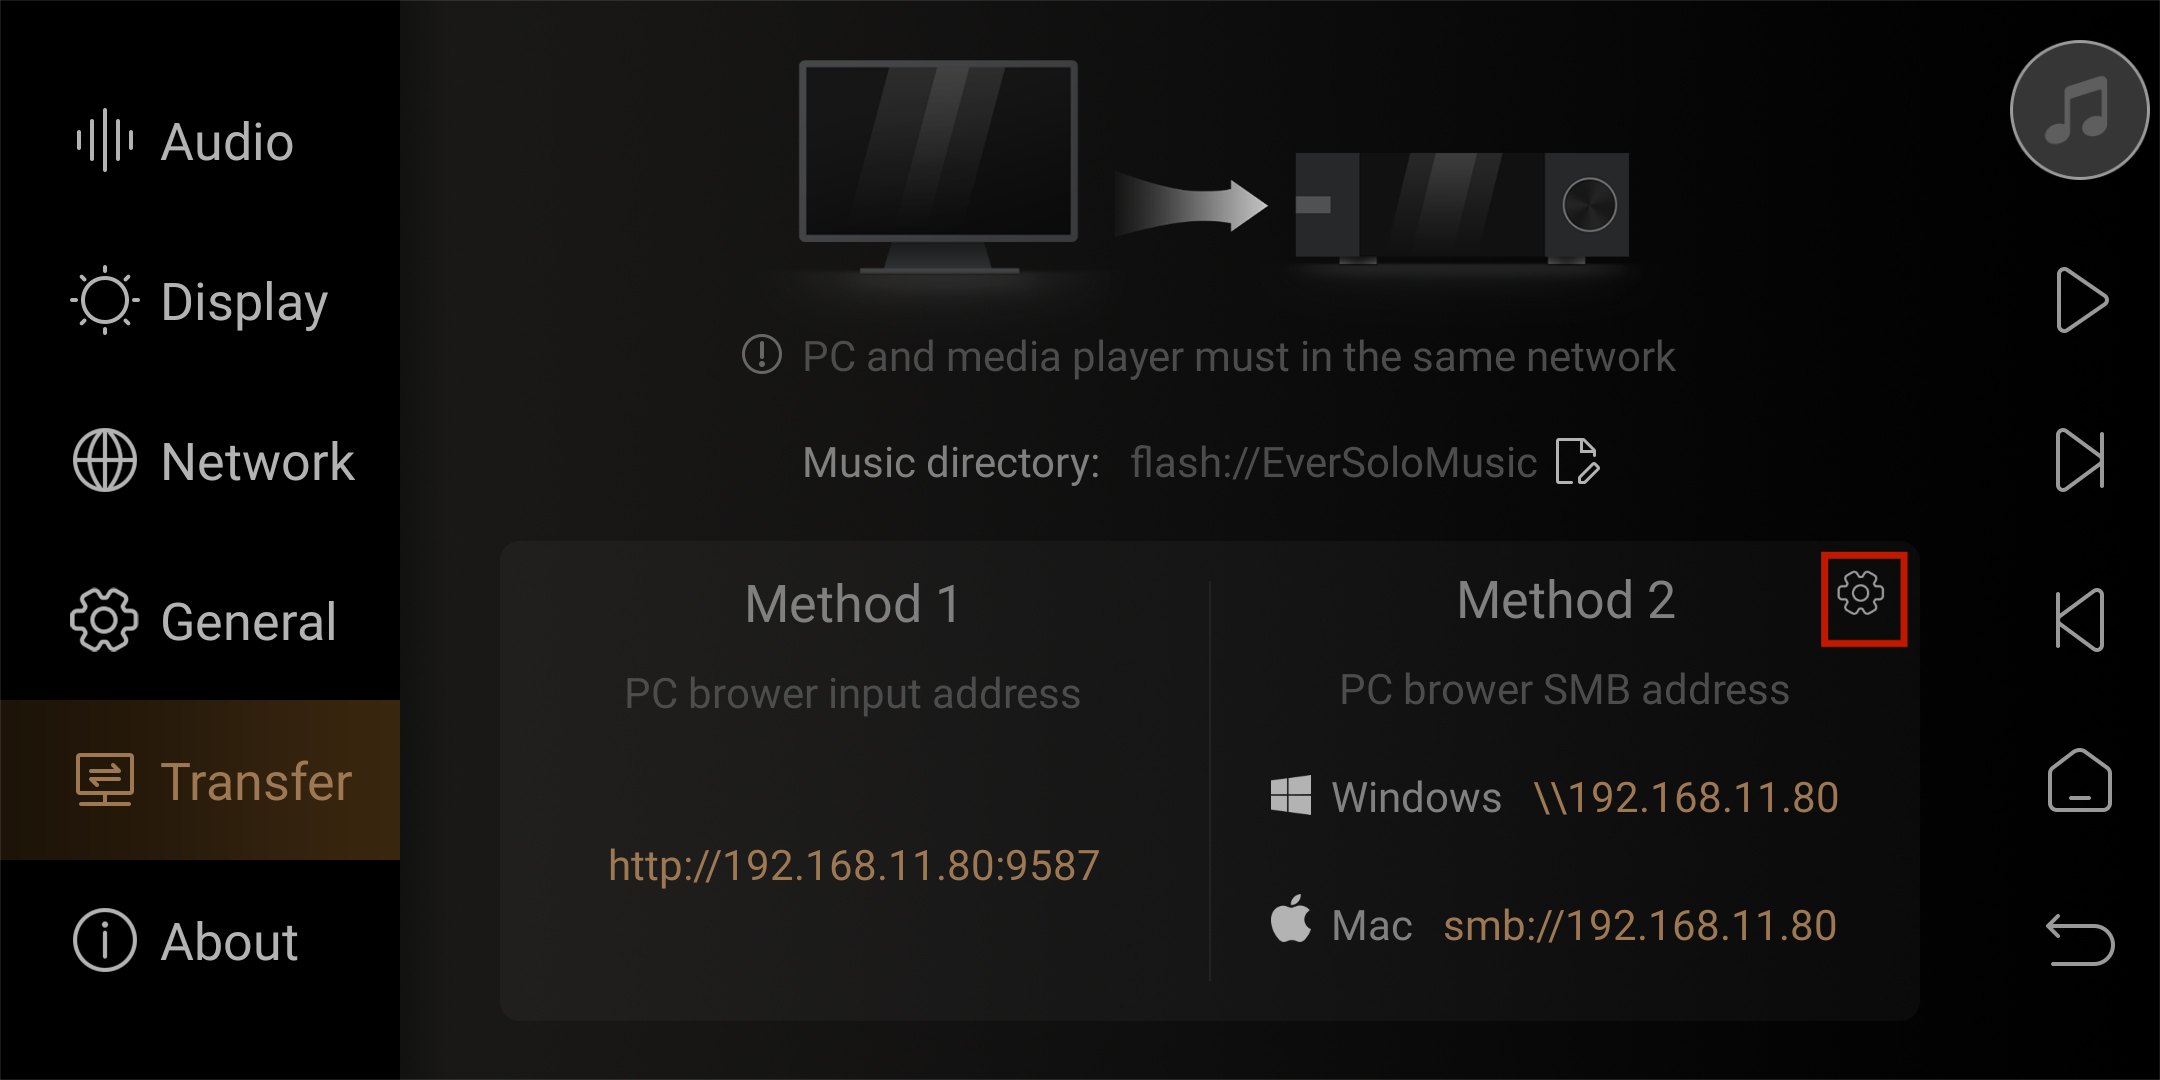
There are two methods for song transfer on DMP-A6. You can access the “Transfer” menu by entering the “Settings” on the device. Also, remember the local IP address of this option, as it will be used later.
Method 1: Transferring songs via DMP-A6 WEB page using a computer browser.
Method 2: Accessing the DMP-A6 Samba shared path from a computer using the SMB protocol to copy and manage music.
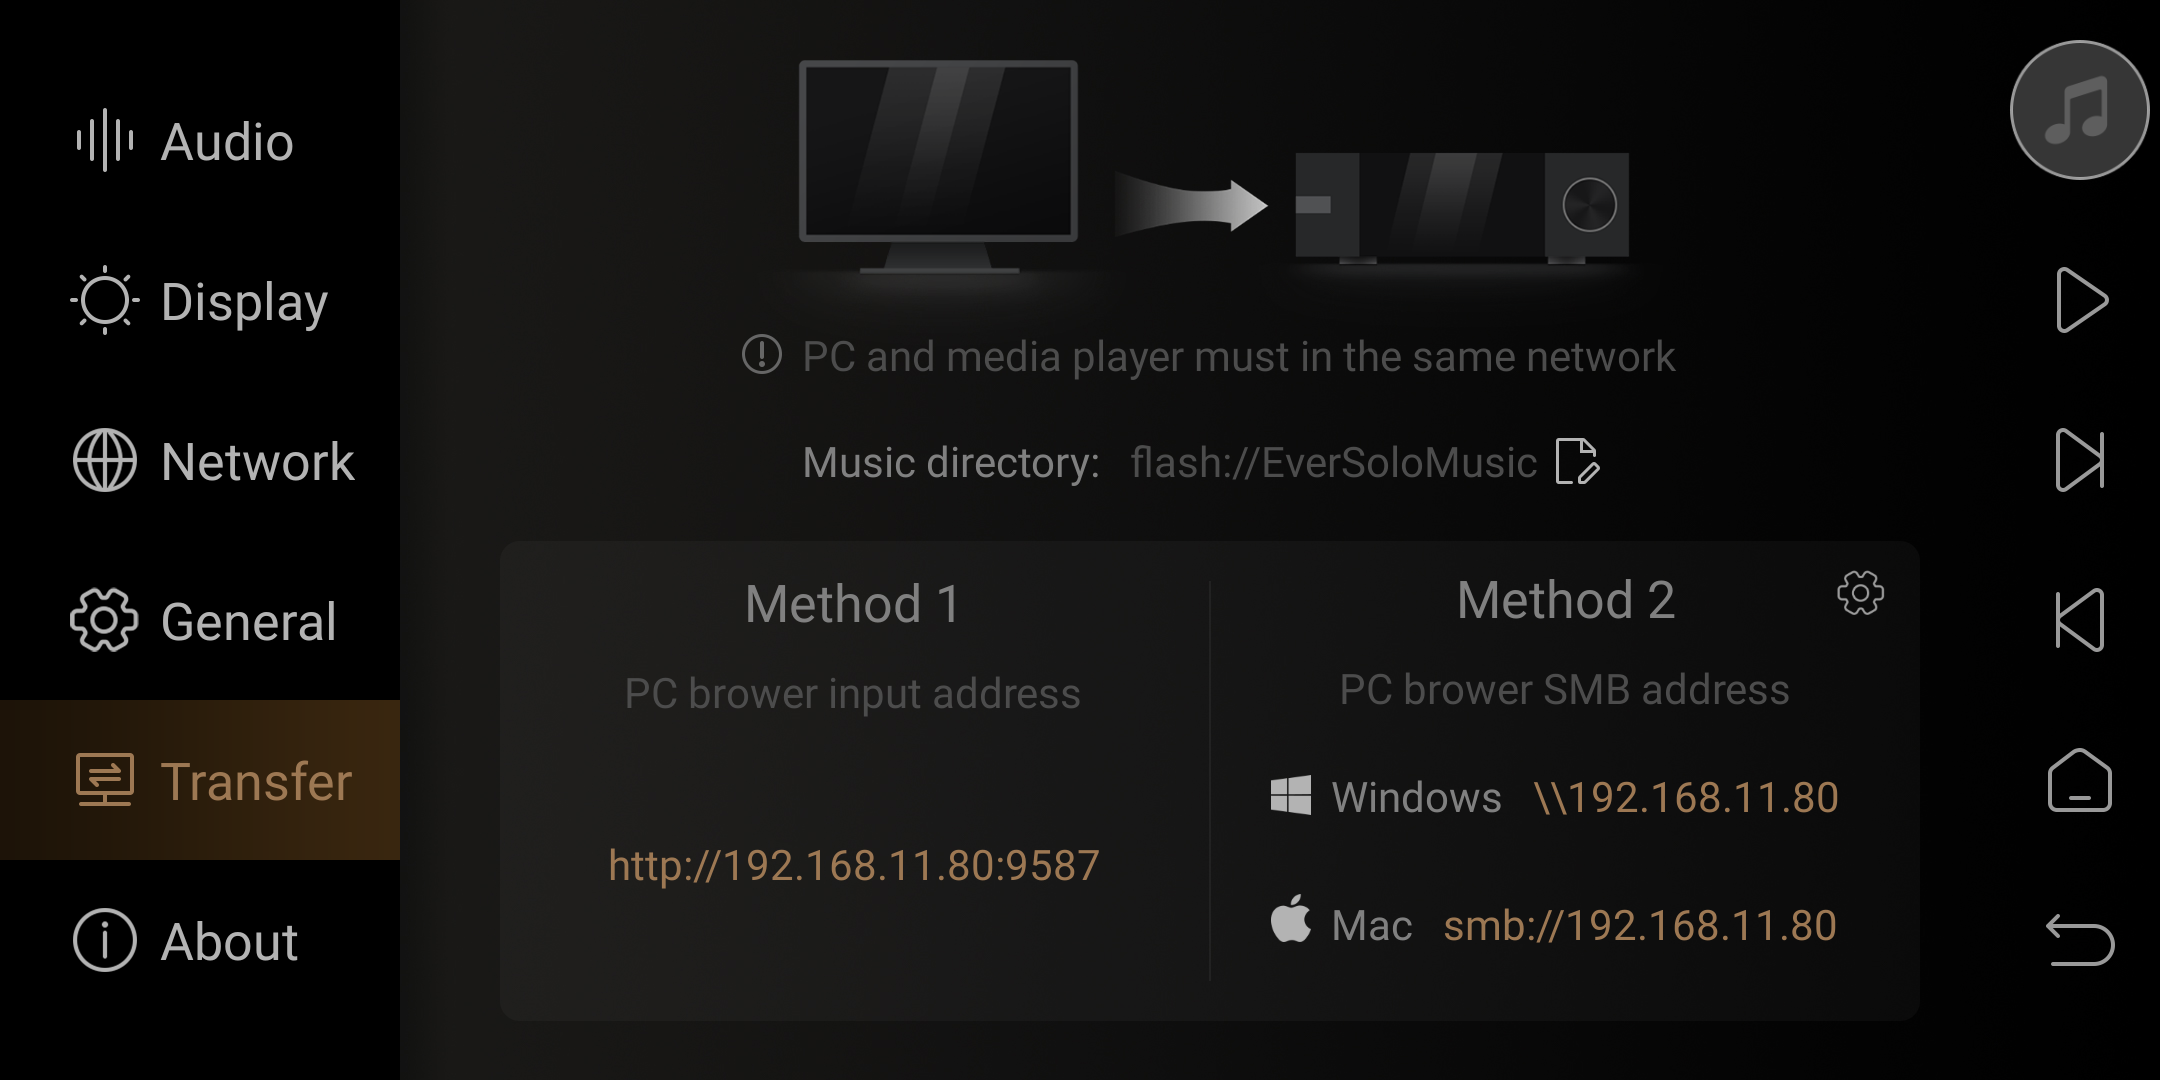
III. Method 1
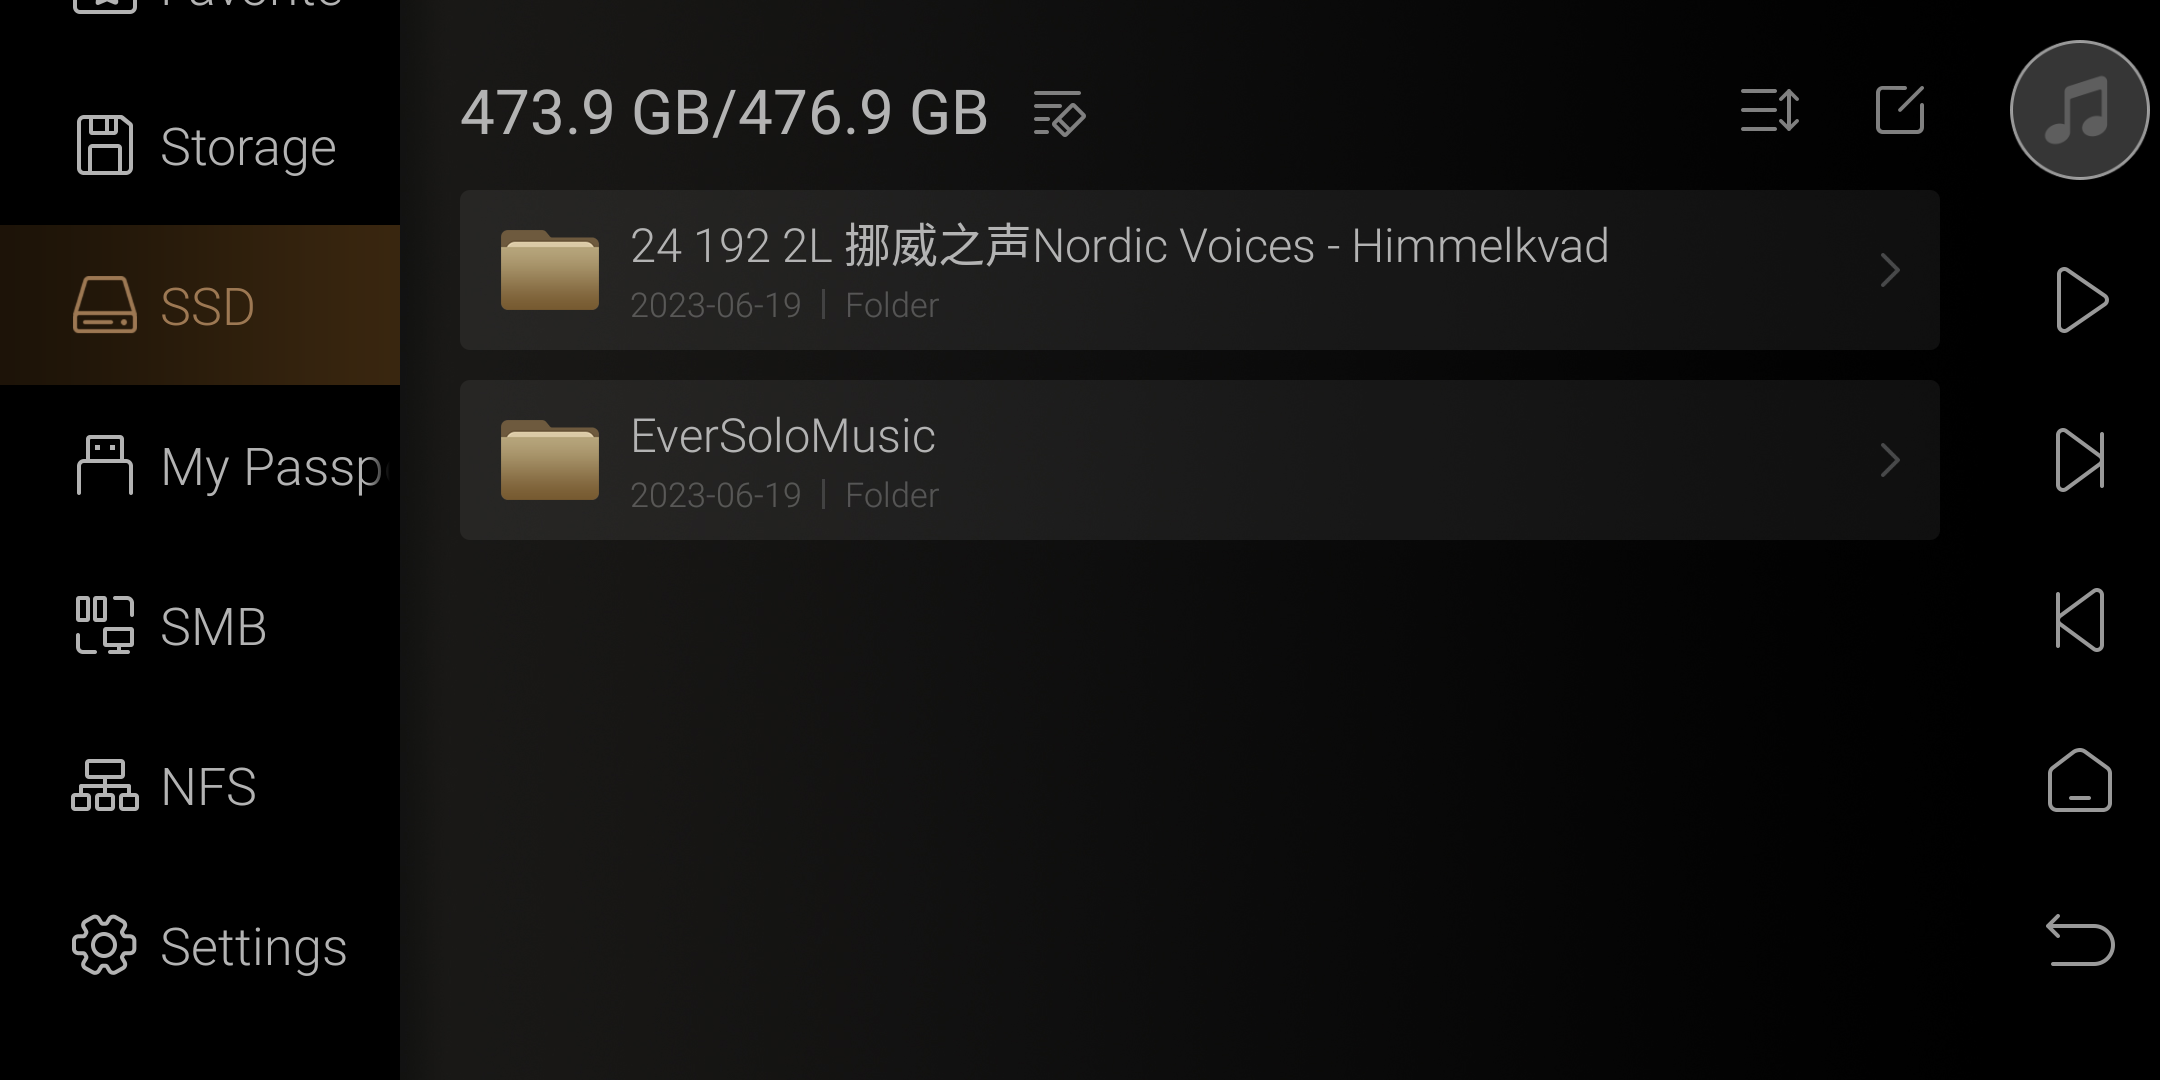
- Go to“Settings” – “Transfer”, and set the music directory to the path of the internal M.2 SSD or external USB hard drive. The DMP-A6 will automatically create an “EverSoloMusic” folder at the root path of the hard drive. Then, remember the IP address and port number.

- Enter the IP address and port of DMP-A6’s transfer menumethod 1 in the web browser on your computer to access the web-based song transfer page. Example: DMP-A6’s IP in tutorial : 192.168.11.188:9587
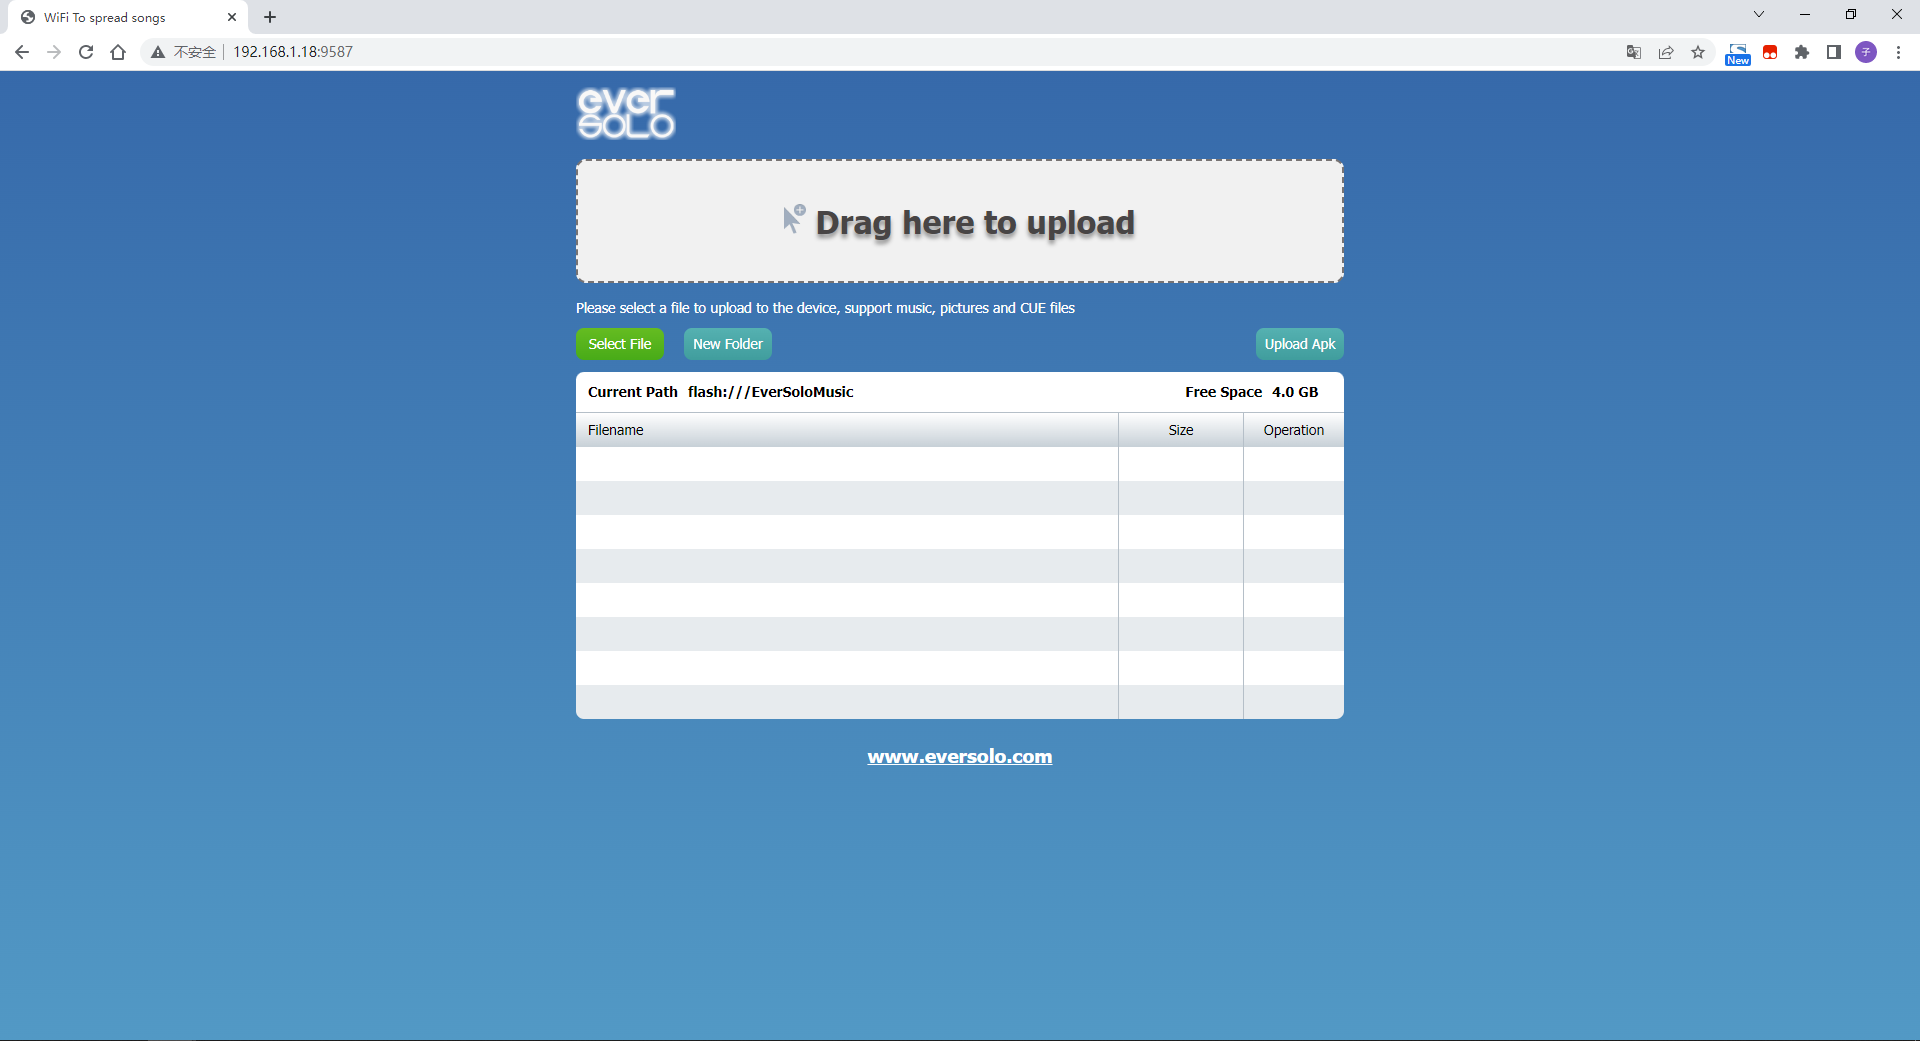
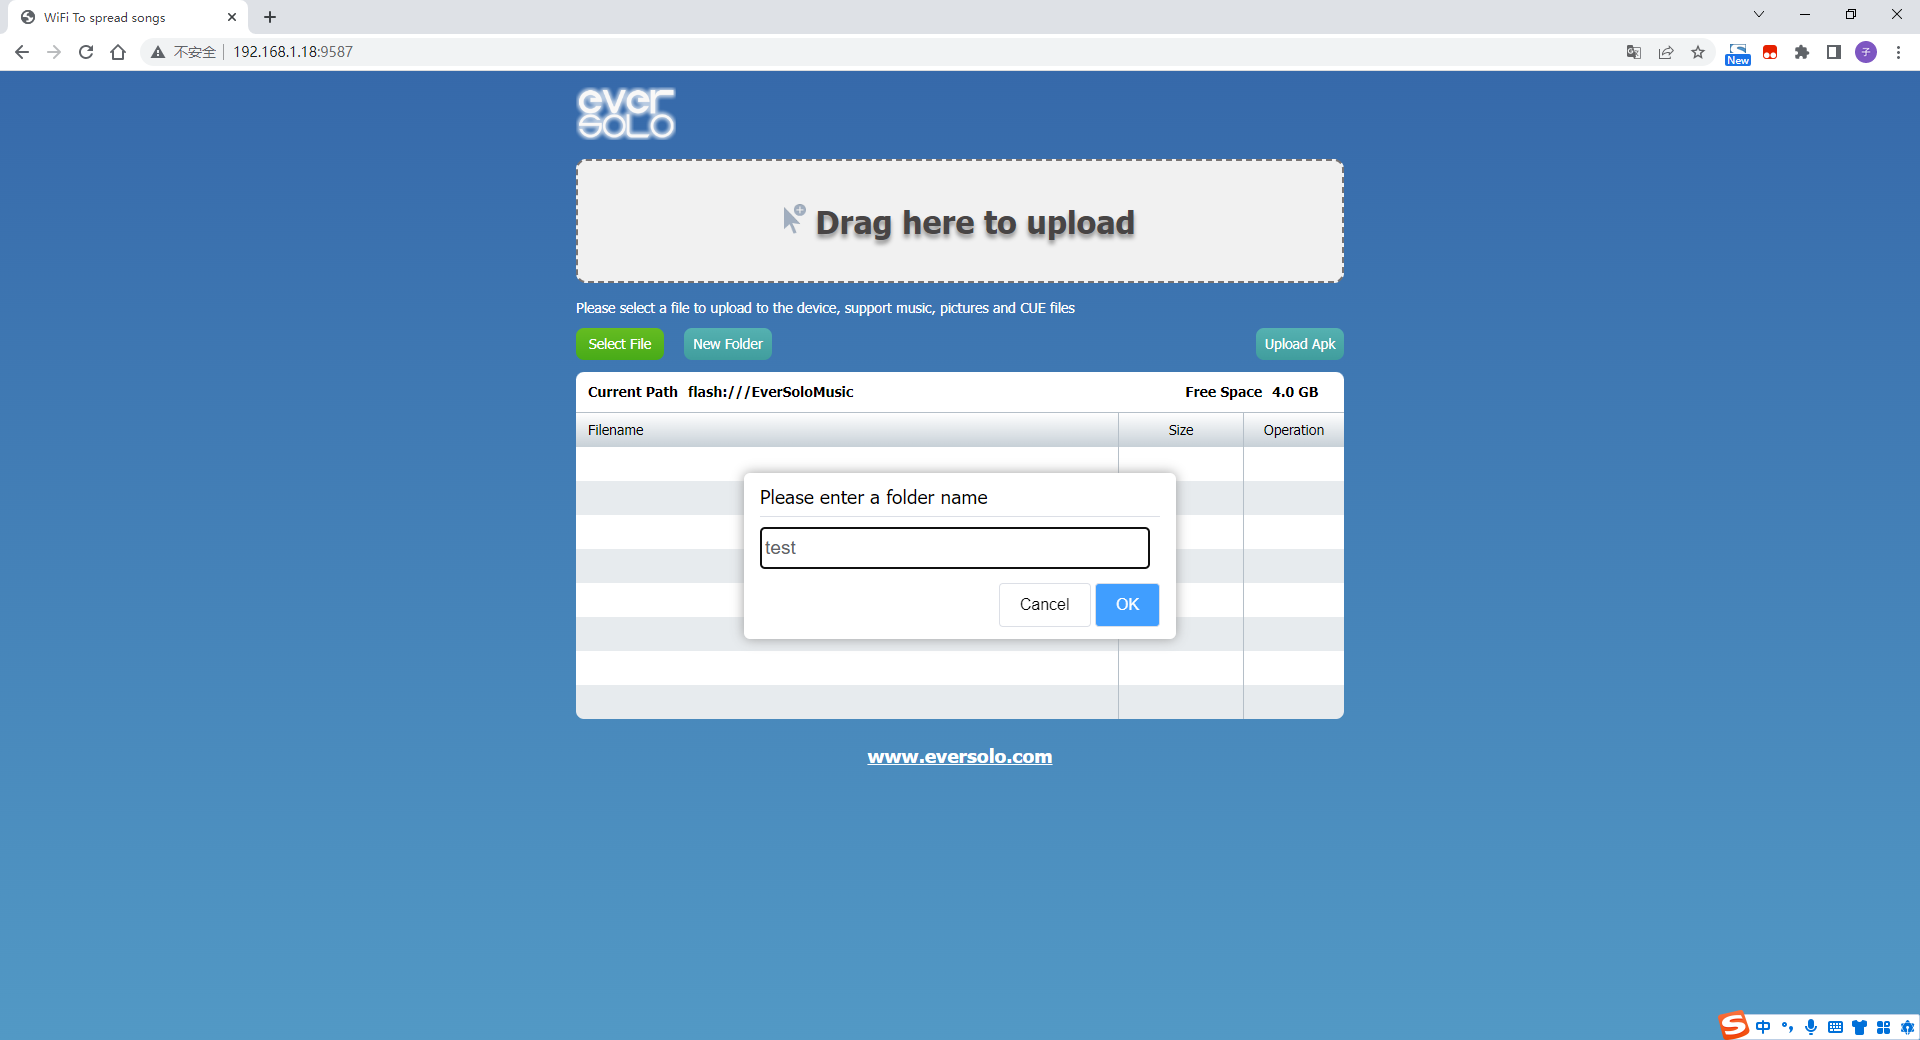
- It is recommended to create a new folder within the EverSoloMusic directory. [See the image below] Click on “NewFolder” – Enter the desired folder name and click “OK” to save.
On the right side, you can edit, rename, or delete this folder.

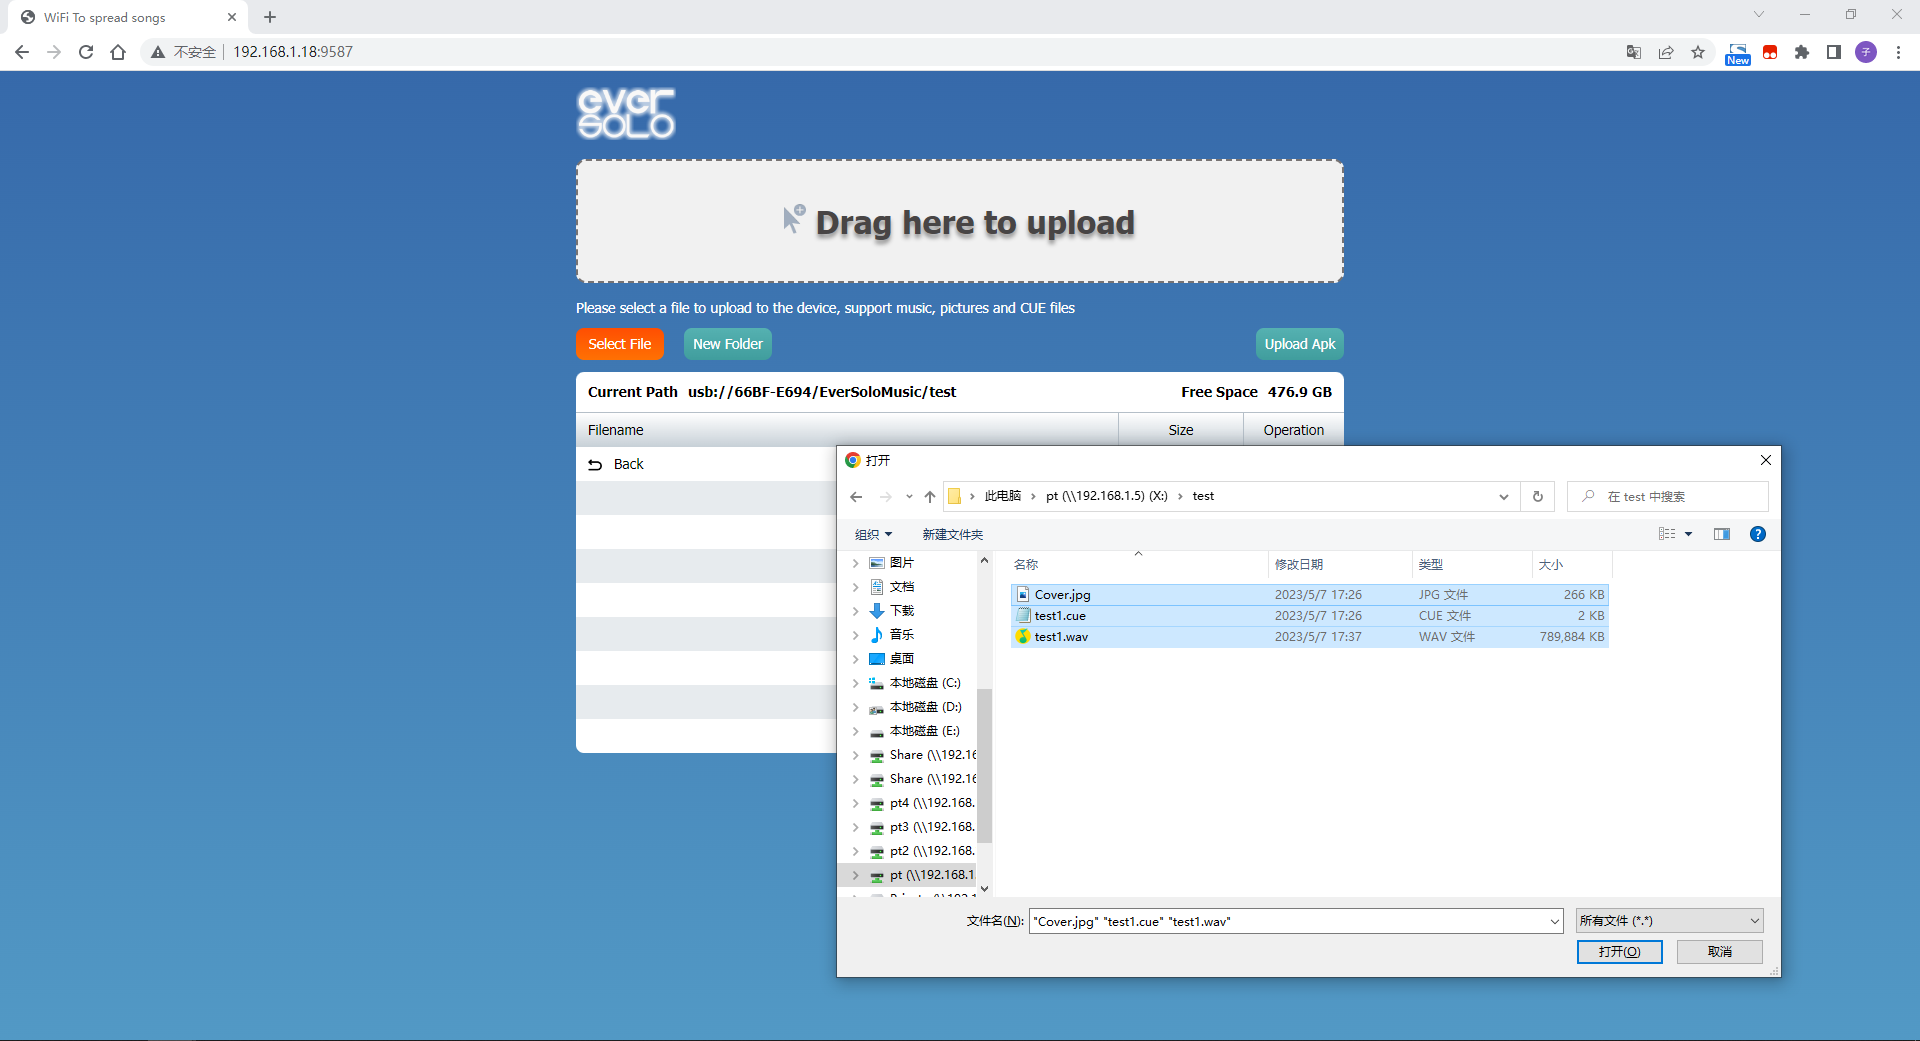
- Enterthenew created folder, click “Select File” – choose the music album folder on the computer, then select all the album music and image files, click “Open”, and wait for the upload to complete.
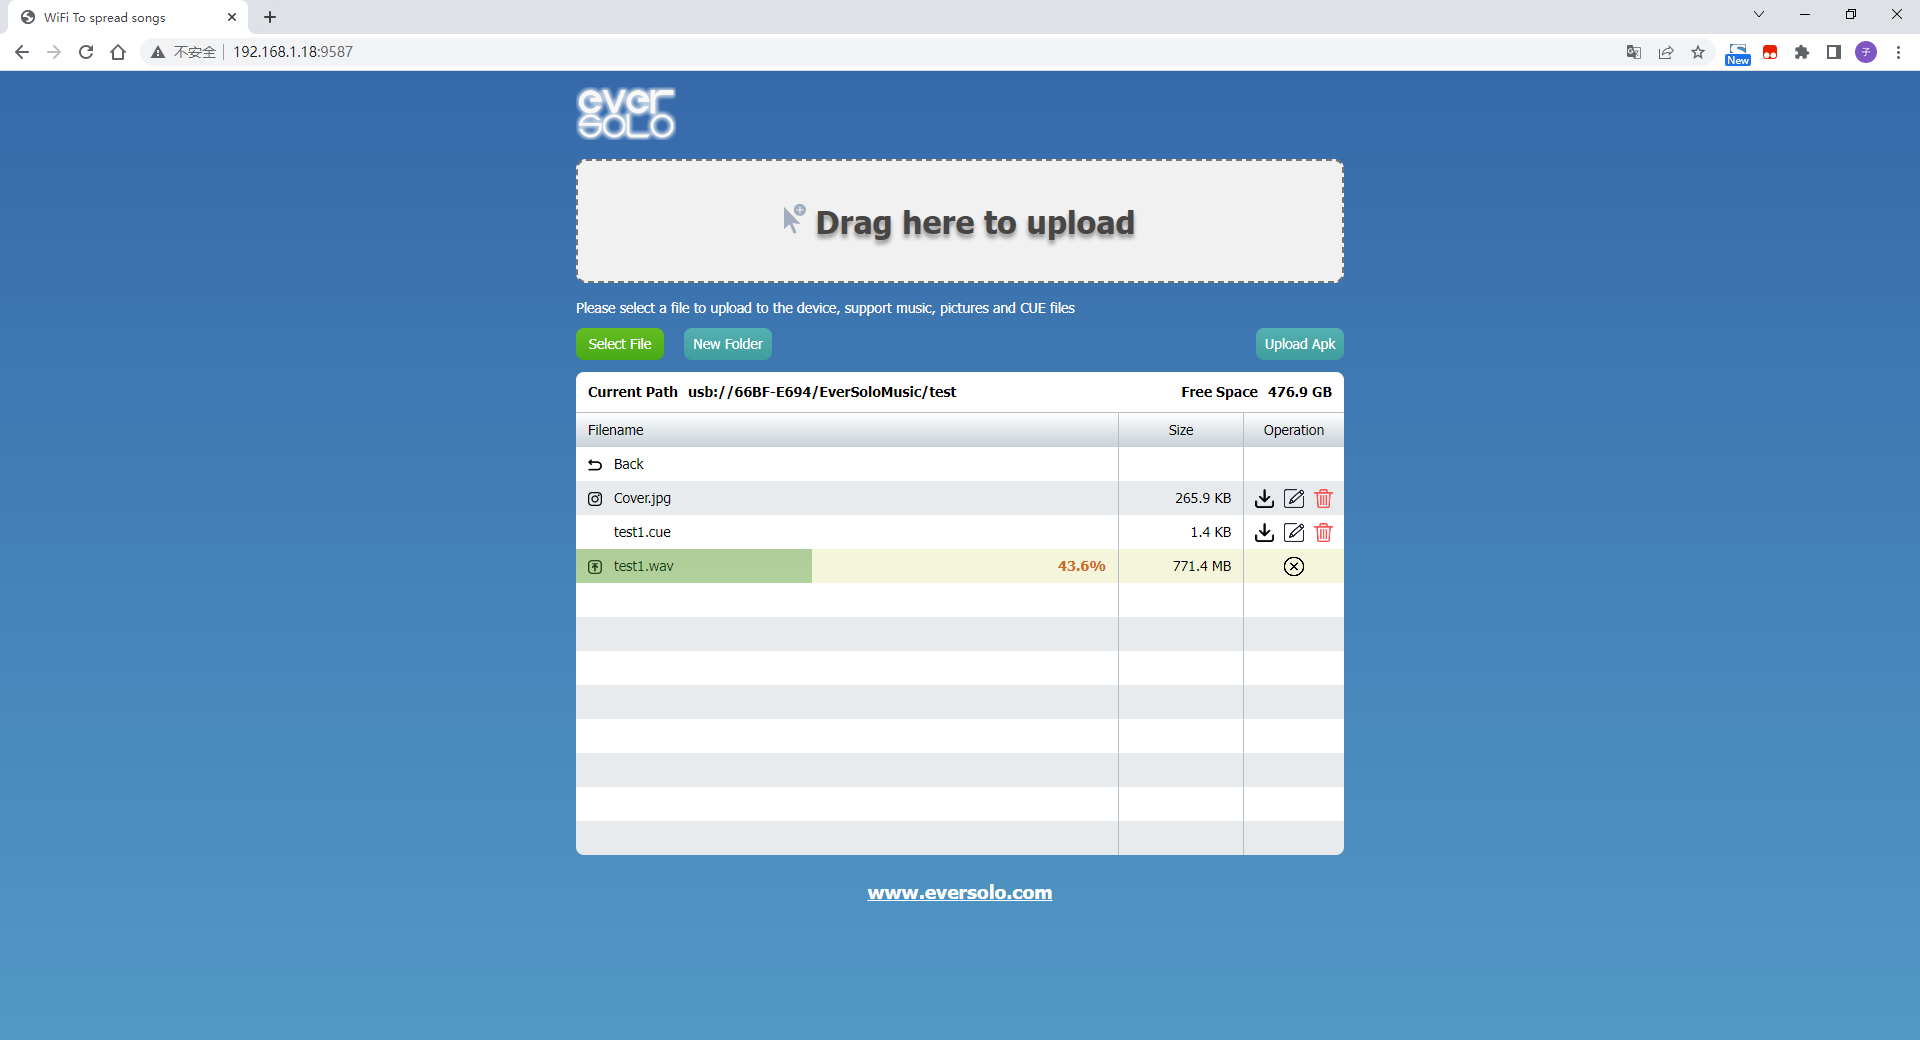
- After the upload is complete, the options on the right side are respectively downloading to the local device, renaming the file, and deleting functionality.
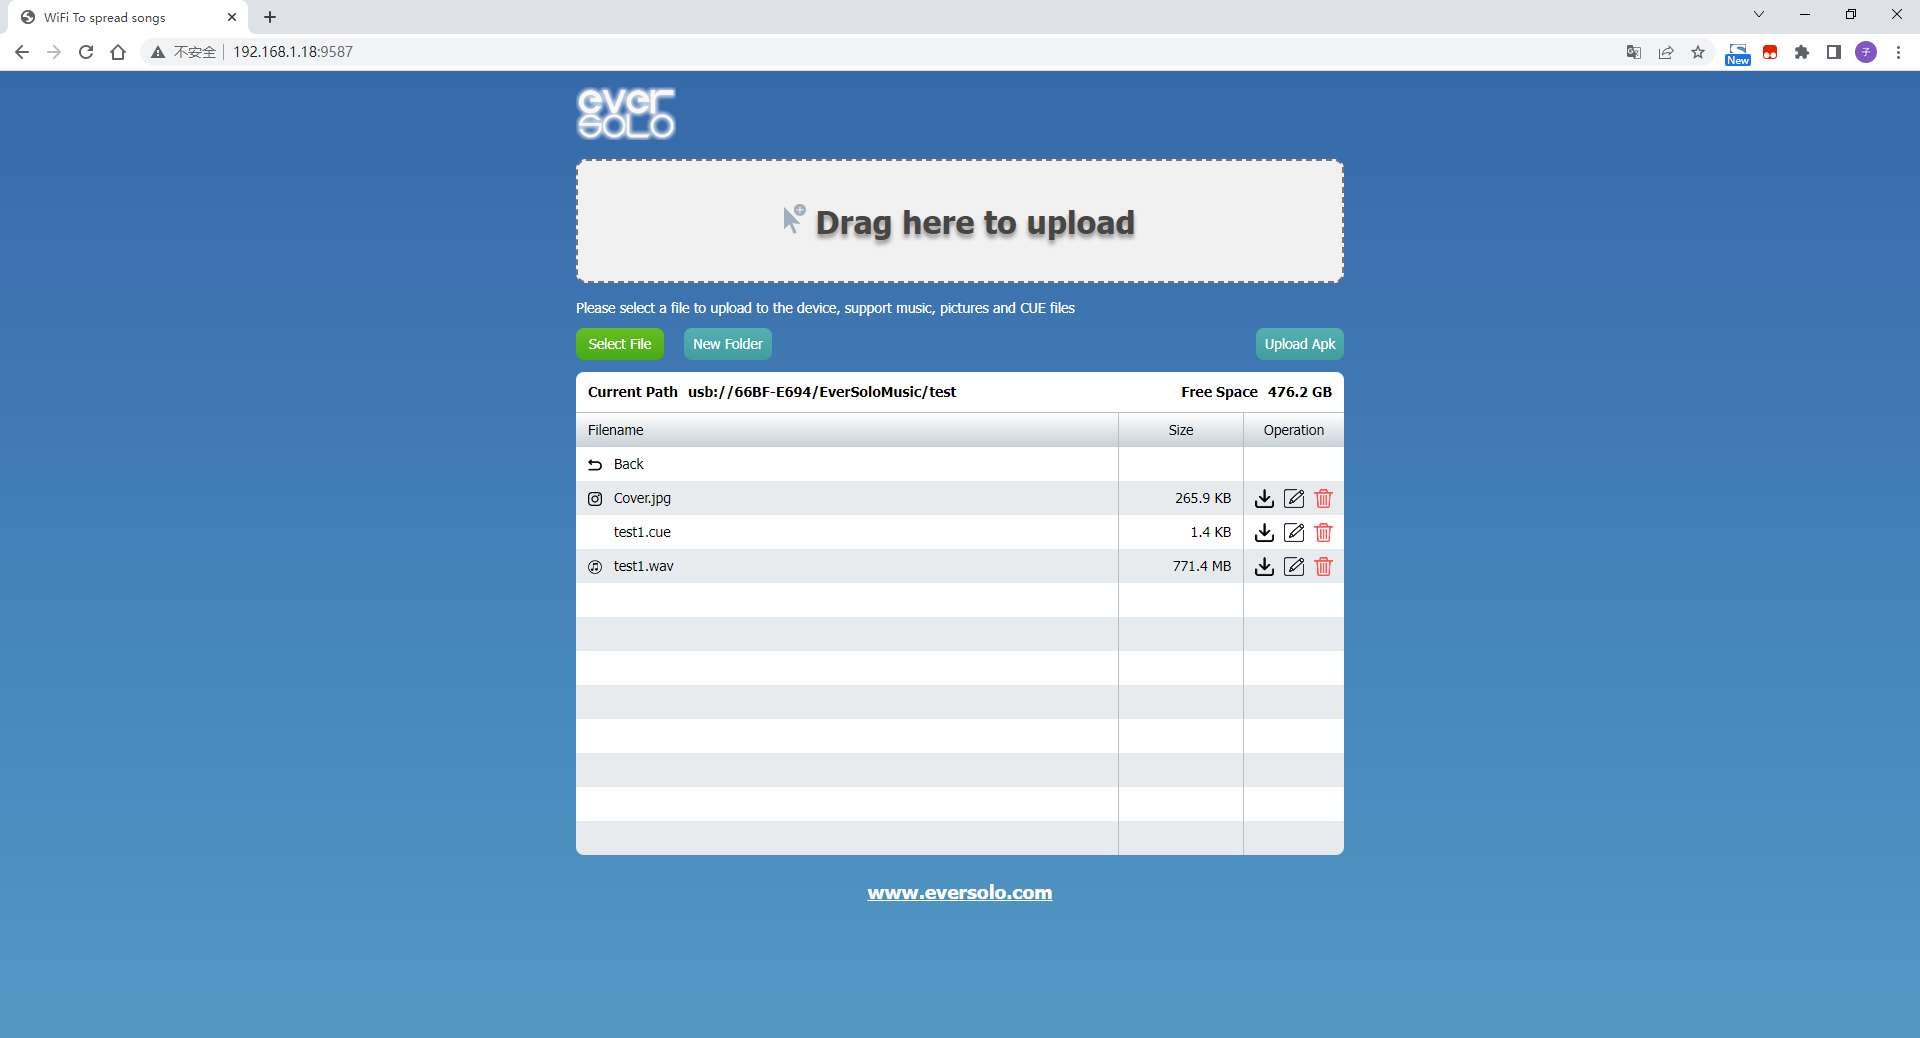
- Finally, return to the DMP-A6 file management to view the files, and repeat steps 3-4 to upload music again.
- IV. Method 2 (Recommended)
- [As shown in the picture below], go to “Settings” on the device, navigateto the “Transfer” menu, and click on the “Method 2” represented by a gear icon.
- Enable Samba service and allow data writing. If you want to set a password for Samba access, please enable password authentication.
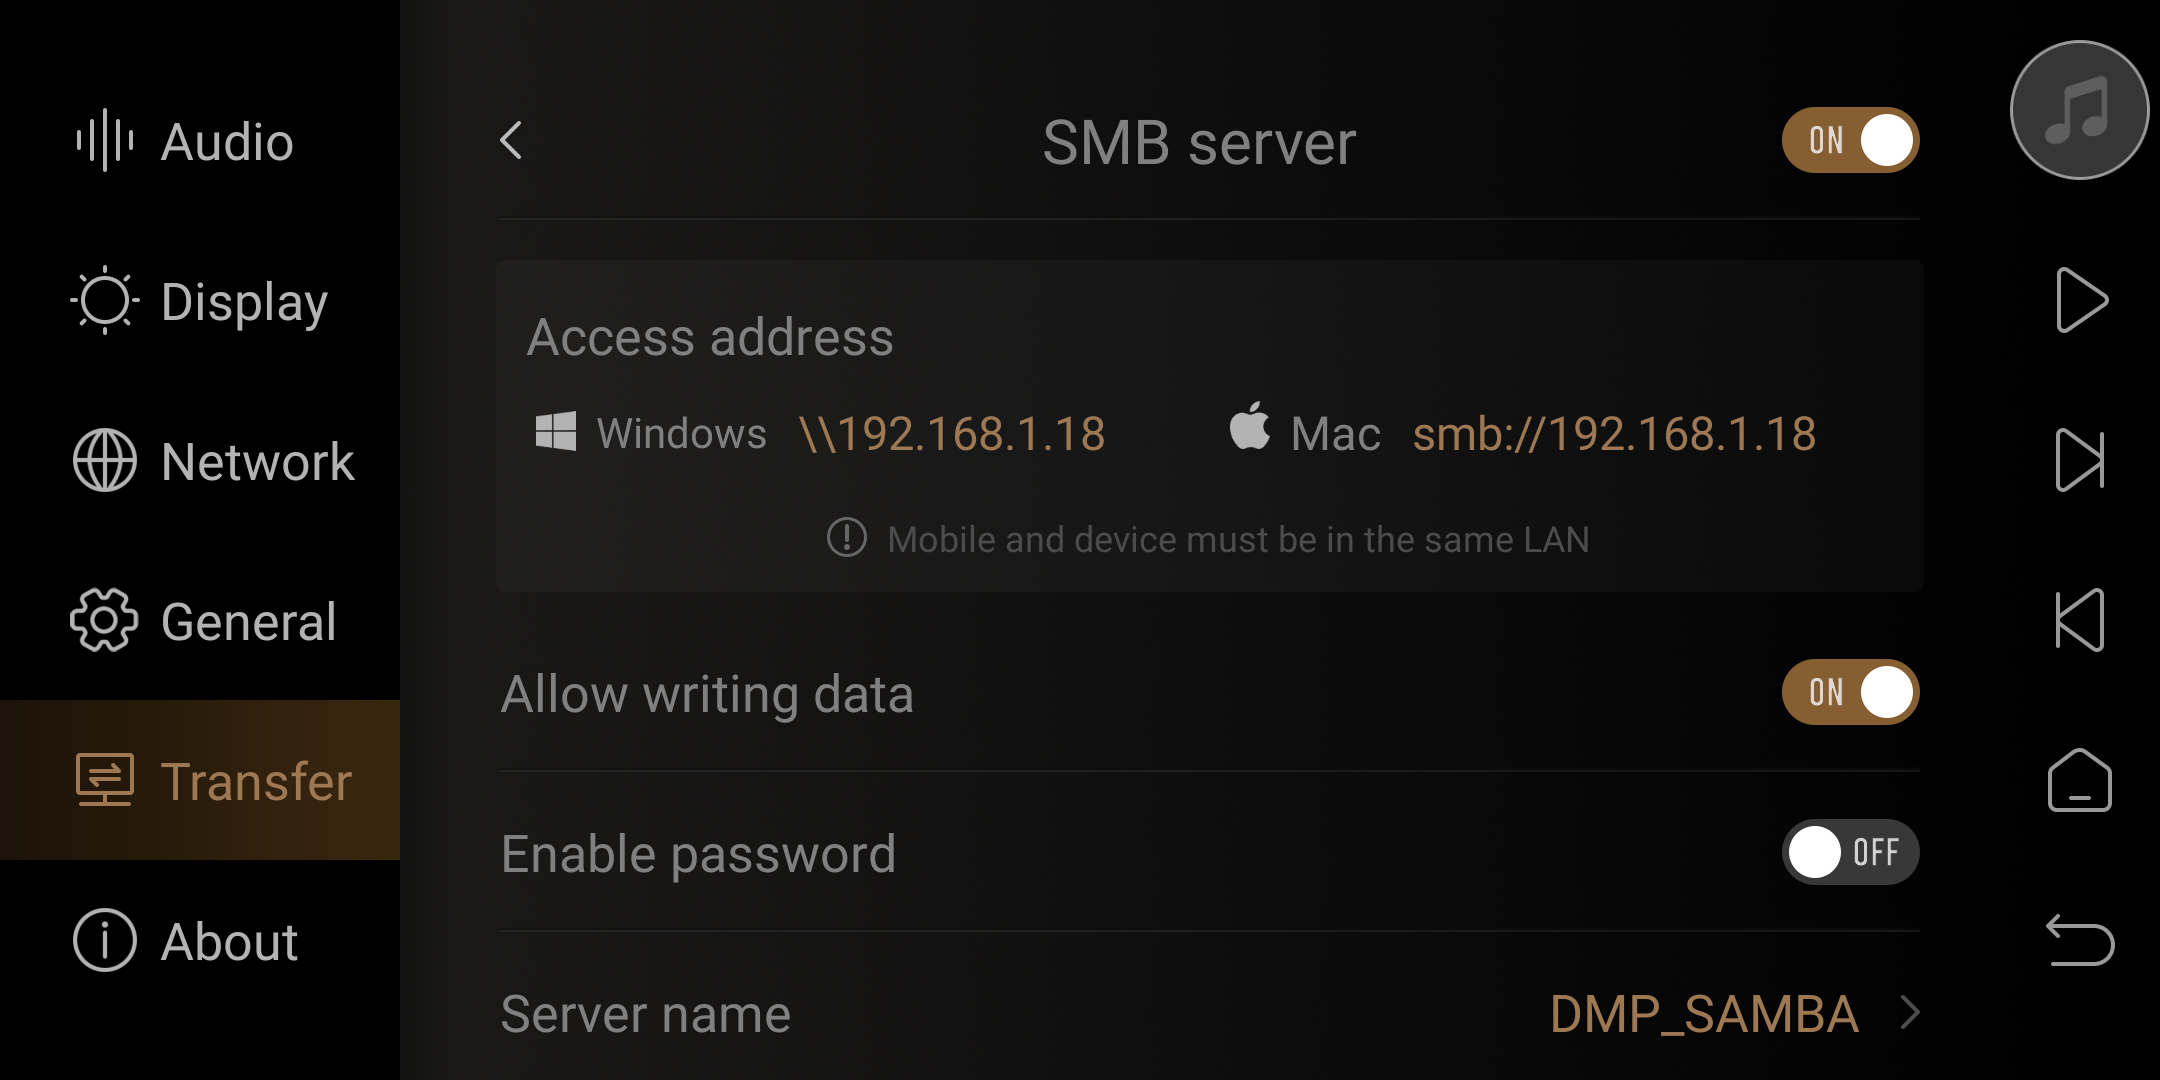
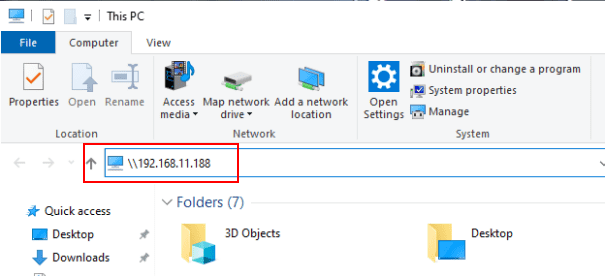
- Taking the WIN10 system as an example, open any folder or the computer drive display interface. In the location shown in the image below, type\\DMP-A6 IP address, the tutorial is: \\192.168.11.188, and then press Enter.
Note: Do not write the slashes in reverse.
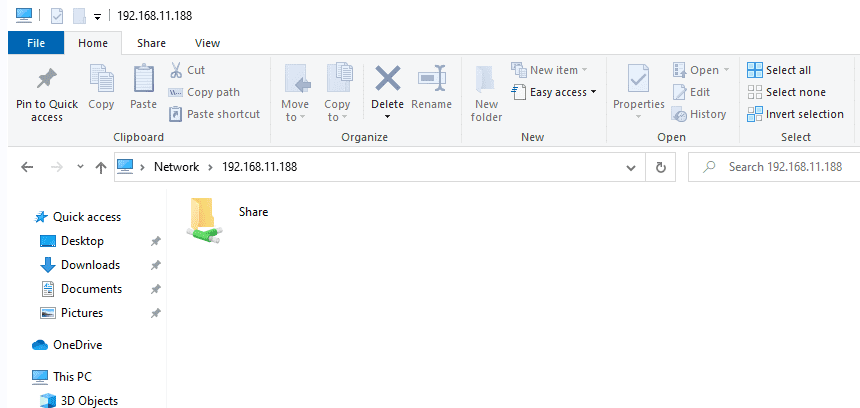
- After entering, you will see the shared root directory “Share” folder of DMP-A6. Click to enter.
Note: If you have customized an account password for DMP-A6, please enter the account password you have set when a menu pops up.
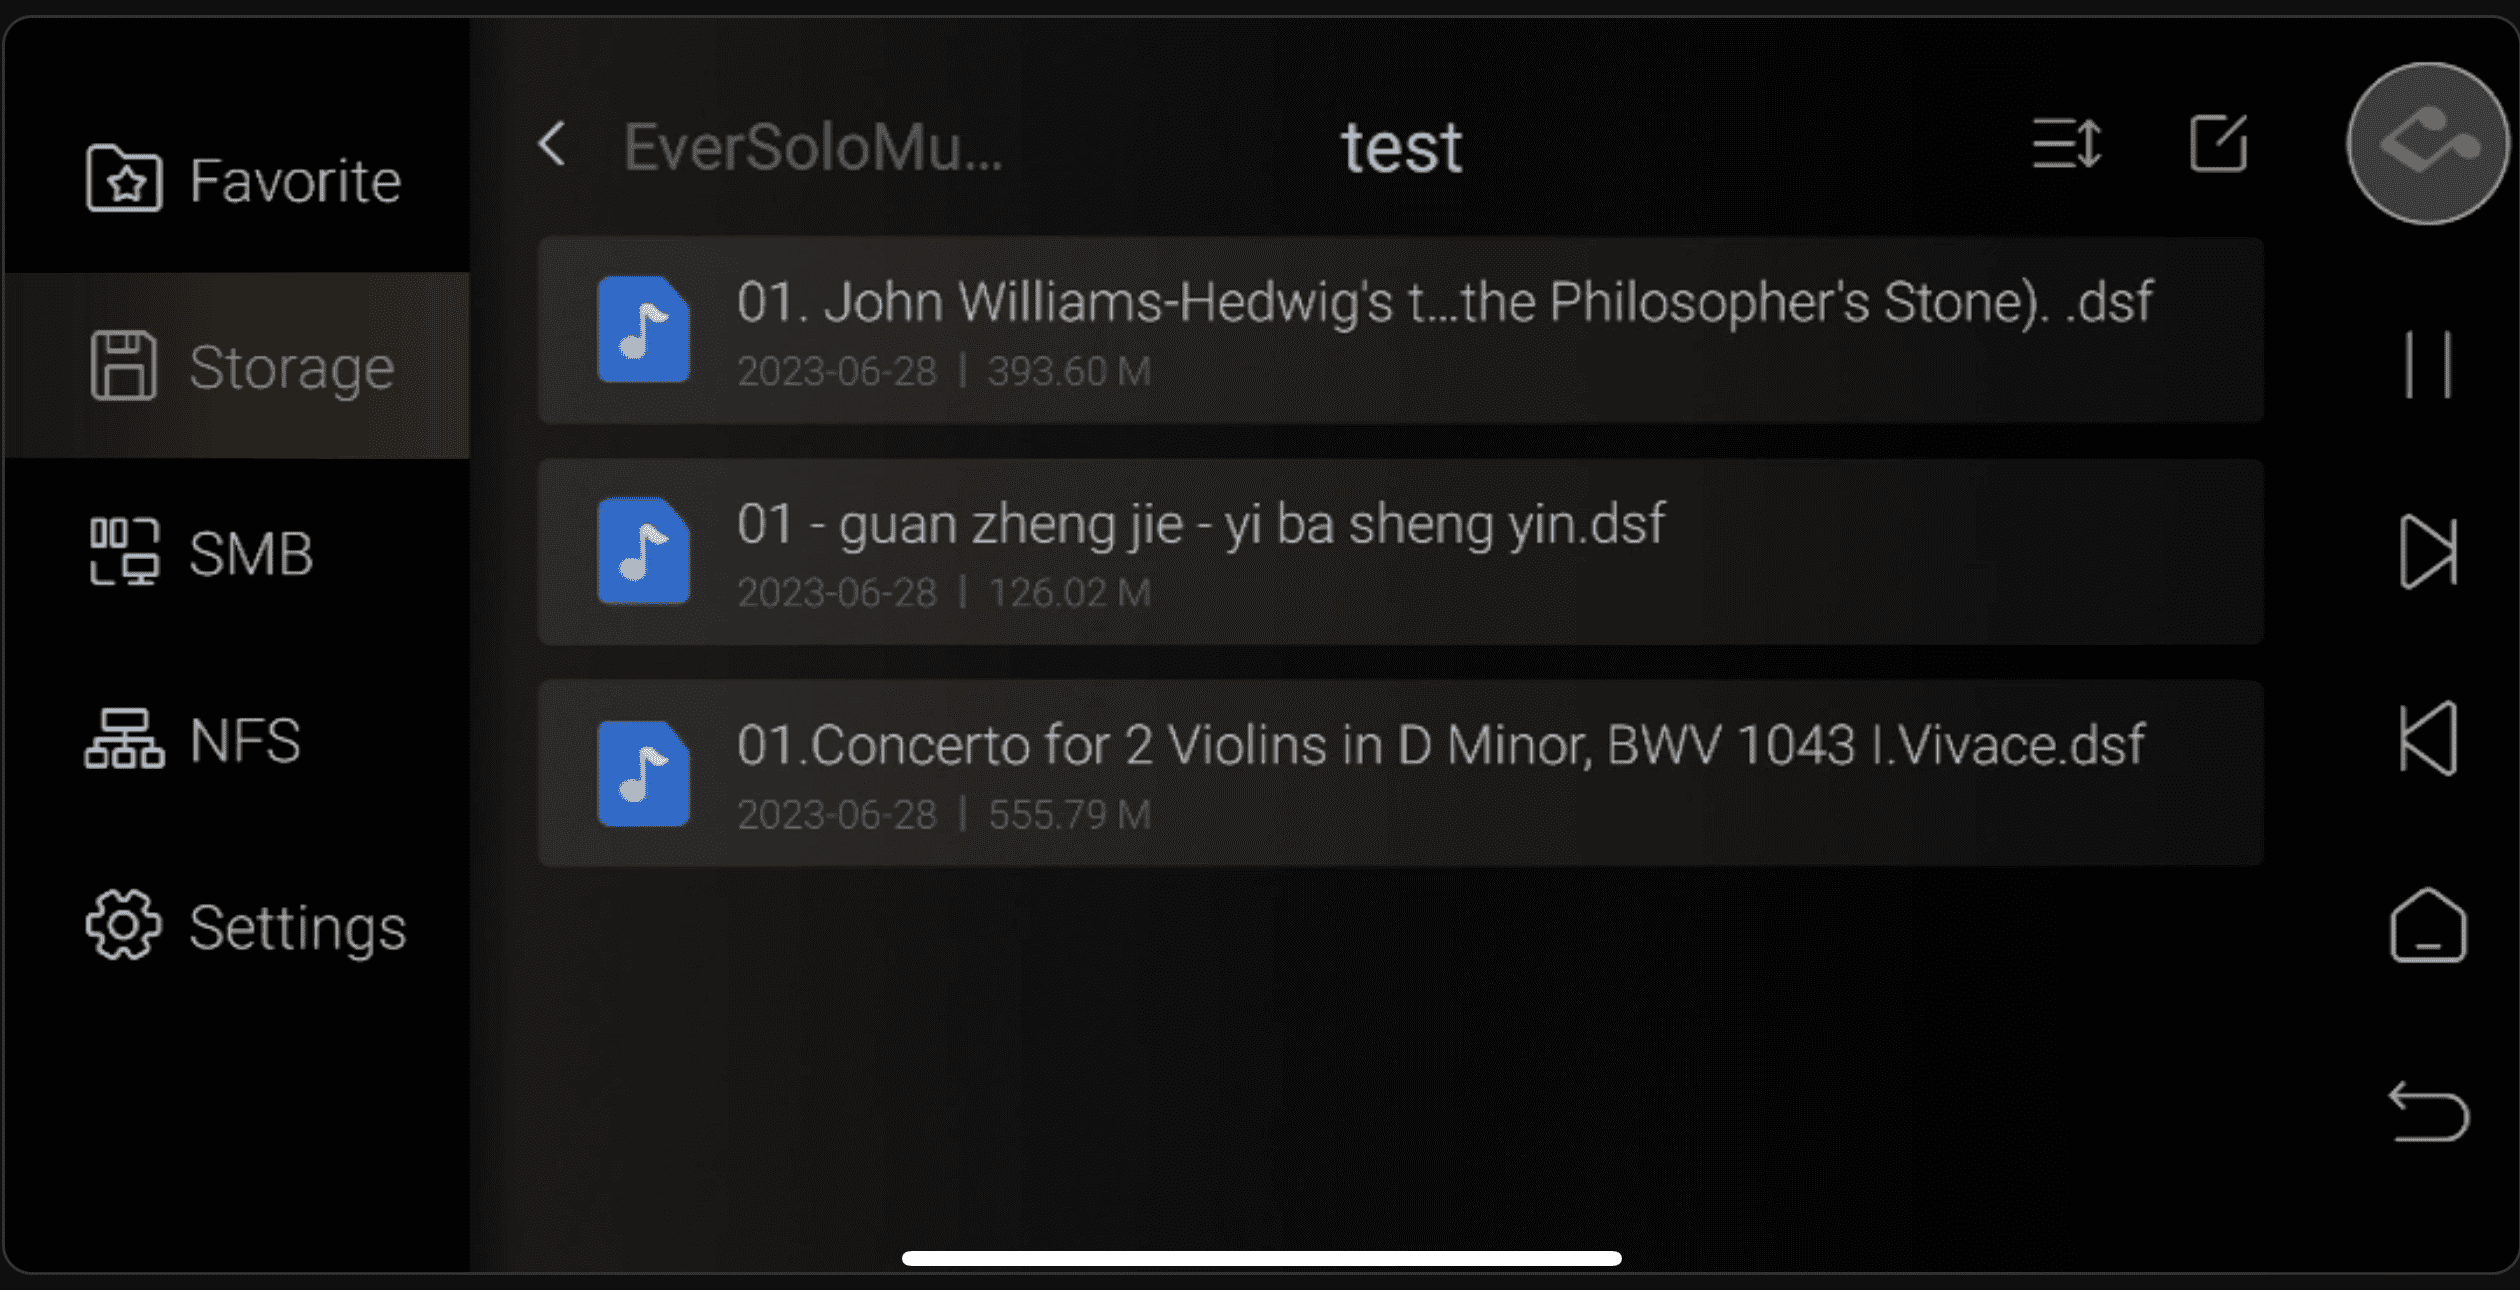
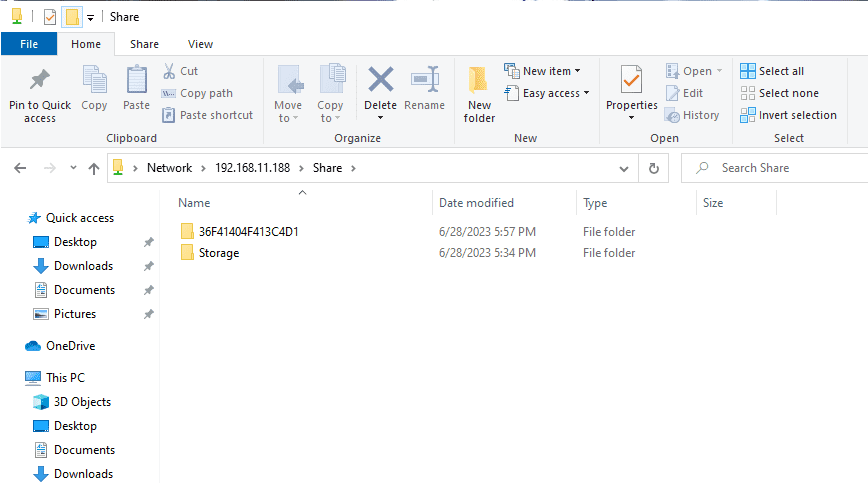
- After entering, the “Storage” folder represents the built-in storage of the DMP-A6, whileother folders with alphanumeric drive names are for M.2 SSD or external USB hard drives.
- Finally, you can copy the music to the DMP-A6 hard drive using your computer. The transfer speed will depend on the transmission rate of your local network.
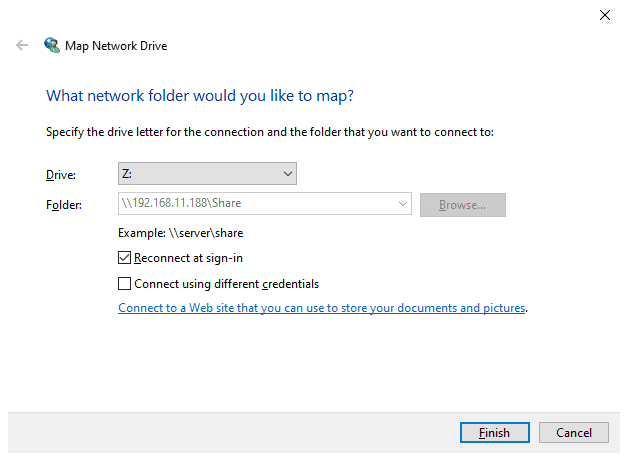
- Additionally, you can also map the hard drive folder as a network drive on your computer for convenient long-term usage. To do this, go back to the shared root directory of the DMP-A6, right-click on the Share folder, and select “Map Network Drive” from the options.
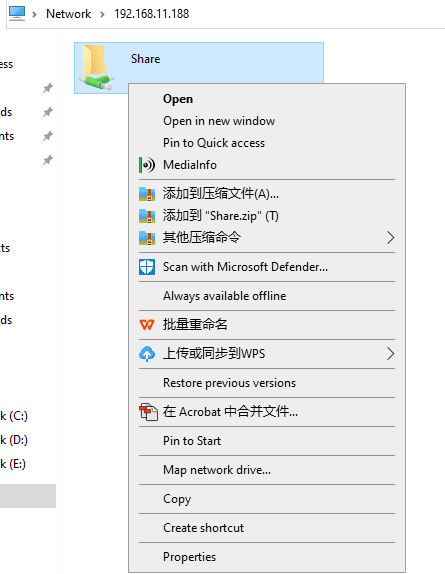
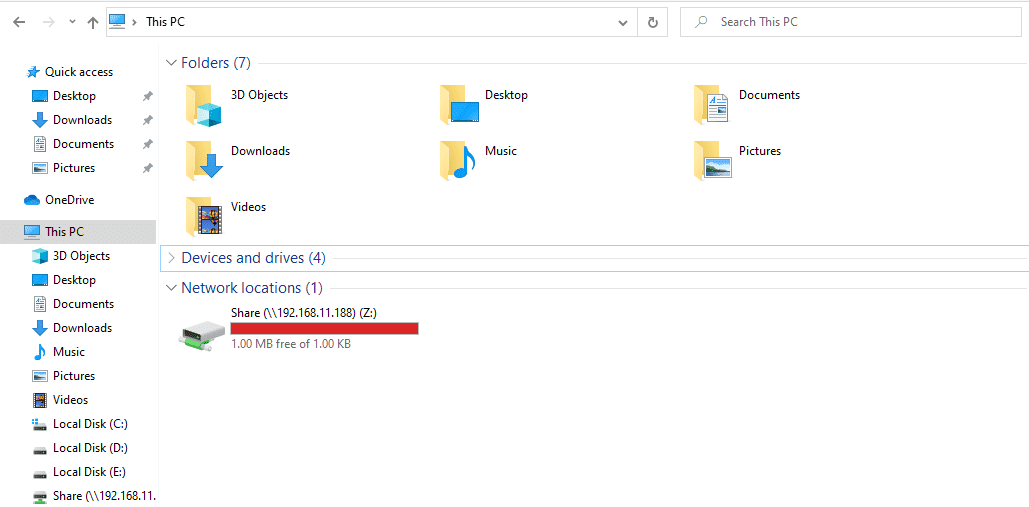
- When you use the default configuration and click “Finish” on the pop-up menu, a network drive will be created in the “This PC” network location. This will be the shared path for the DMP-A6 Samba service.
Friendly reminder: It is advisable to set a fixed IP address for the DMP-A6. You can do this by accessing the router management page and assigning a static IP address to your device. Otherwise, each time the DMP-A6 is restarted, the IP address may change, requiring you to reconfigure the settings mentioned above.
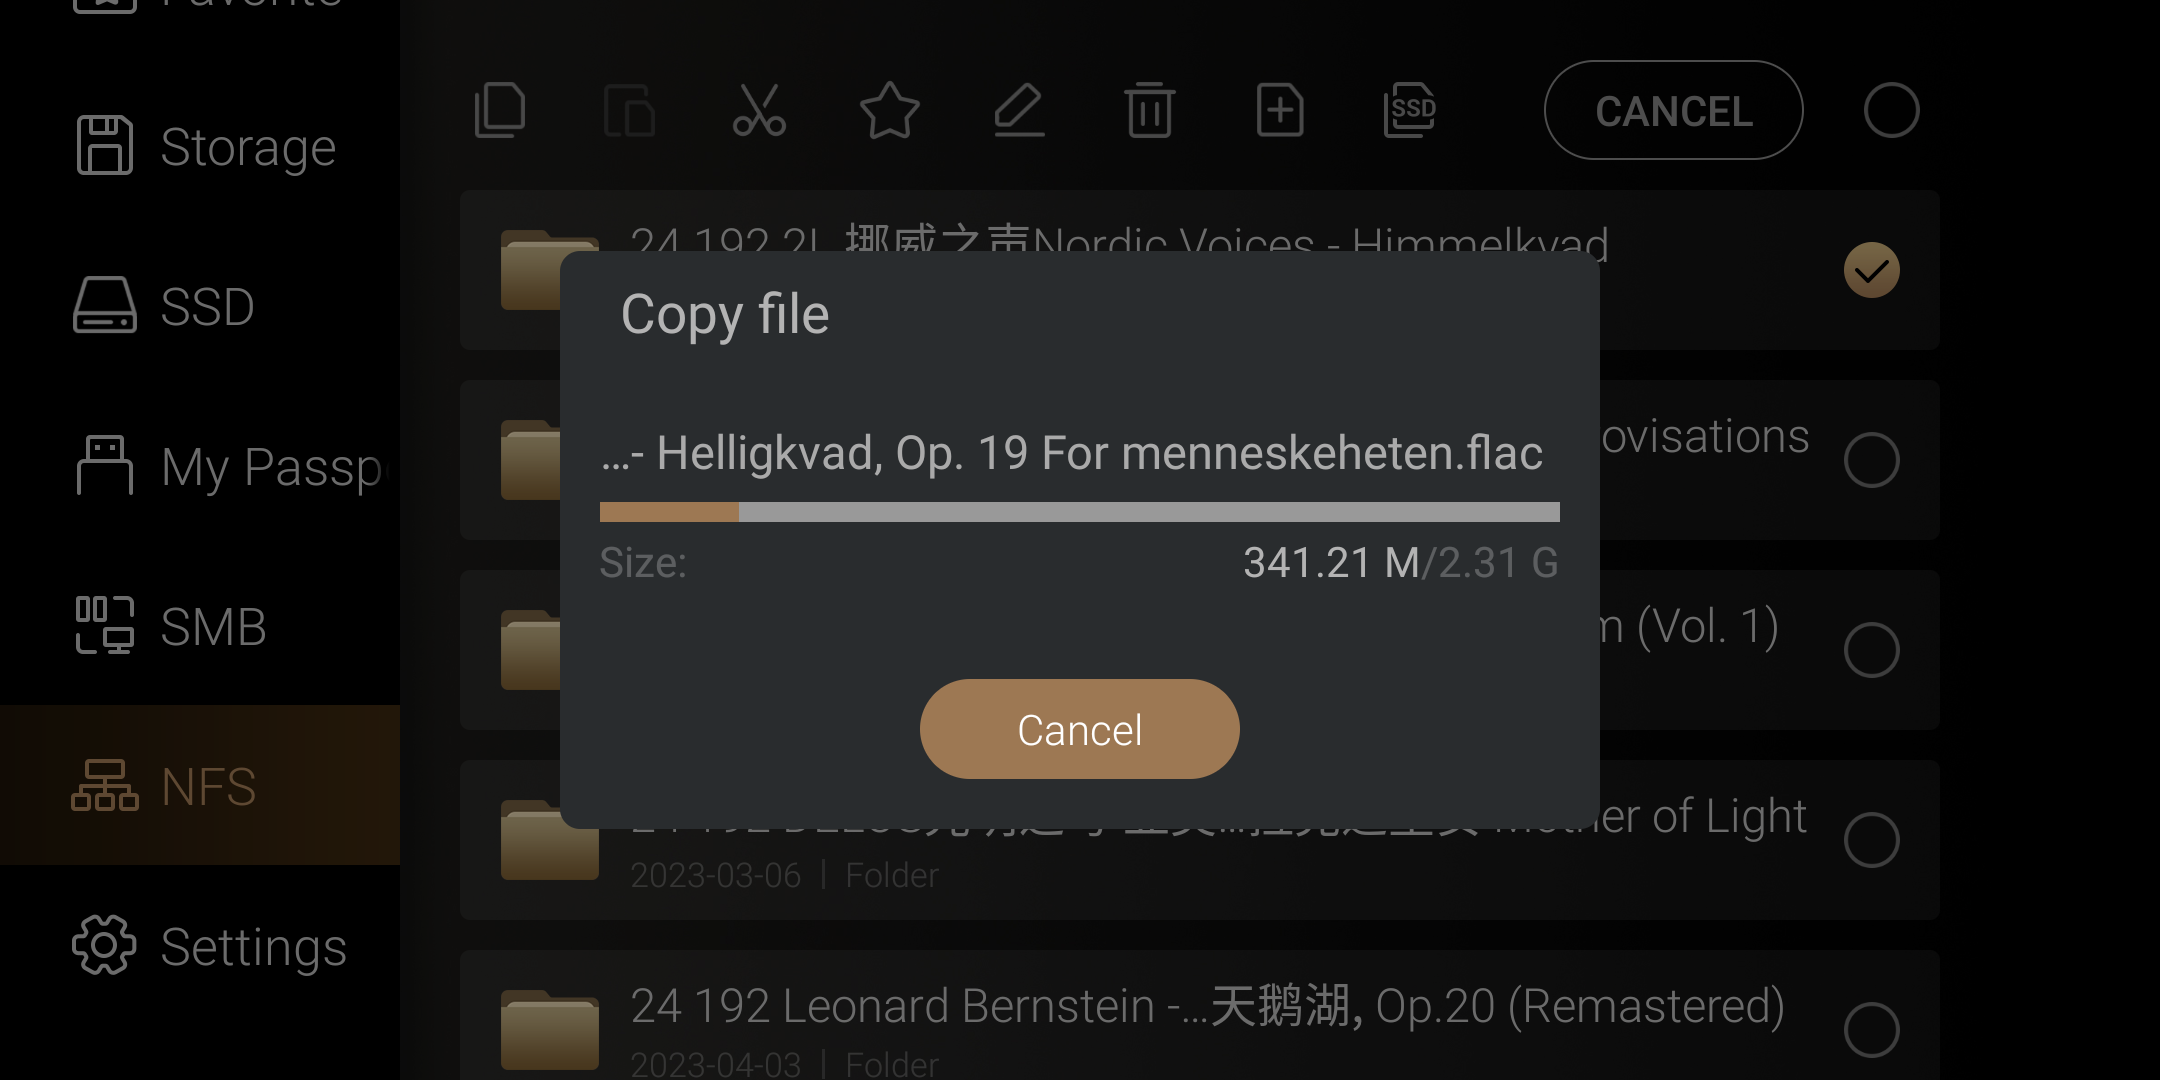
- V. One-Click File Management Copy to Built-in SSD Feature
- After installing an SSD hard drive in DMP-A6, you can access other storage media or LAN shared NAS through file management.Long-press the music files you want to copy (support selecting multiple folders), and then click the SSD icon at the top to easily copy the selected music folders to the built-in SSD hard drive.

Exclusive events and announcements.