 |
|
Step One
Remove the foam strip from the Silver Tonearm Lifter. This will give you the first mm of height reduction. Test it on your turntable. If it fits then proceed with normal installation. |
|
|
|
 |
|
Step Two
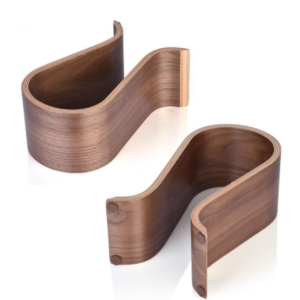
Remove the adhesive on the bottom of the base unit and using a metal file or sandpaper reduce the bottom thickness to about half. This will give you the second mm of height reduction.
Test your results as you go along to see if it is fitting under the tonearm.
When it fits under your tonearm it is ready for normal installation. |
|
|
|
 |
|
FYI
The base on the right has been filed down about 1mm.
Step Three
You will need to re-apply some double faced tape when ready. |
|
|
|
|
I have also received info on modifications by owners of this series of turntables and I would like to share their input. |
|
Using Q-up with Project Debut Carbon:
One option. There may be others.
Use of the Q-up with the Project Debut Carbon, requires some DIY modification as the base unit can not be used since clearance between the silver arm and tonearm is not sufficient. You will need patience, and a steady hand to set the Qup in the correct position. The below, is one option successfully reported that will not mar the finish of your Debut.
First, remove the foam from the silver arm.
Phase two.
1.) Purchase: Scott Outdoor Mounting Double Sided Tape, or other suitable 1mm foam double sided tape with an aggressive adhesive. Optional: Sticky putty, such as blu-tak, to provide added support at the base of the Qup.
2.) Adhere Q UP to one side of the tape. Leave about 1MM additional tape on all sides of Q UP Next, cut outside of the outline of the Q UP , again, leaving to provide for very minor adjustments. Leave the backing on the other side on, for now.
3.) Very Important: Because you can’t easily adjust the Q UP horizontally without the base unit, you must find a record in your collection with a short play out groove (e.g.; 1/2”) relative to other records.
4.) Place the Q UP in the approximate position you expect it will be installed, and very, very carefully lower the tonearm onto the beginning of the play out groove, *without* the stylus guard.
5.) Make minor adjustments such that the trigger is just about to touch the tonearm. Using a tool such as a pencil (rather than your finger) might help to make very fine back and forth adjustments. Depending on the thickness of your double-sided tape, you may have to remove the foam padding on the silver Q UP arm.
6.) Once you have settled on a position for the Q-up, place tonearm in resting position.
7.) Using a visible marker (a white laundry pen might work on a black plinth), mark the very end of the double sided tape with a straight line.
8.) Remove the backing, and very carefully place the front edge of the tape where you made your mark in step 7. You can make very minor adjustments here if the adhesive is not too aggressive, but patience and a steady hand are called for here.
9.) Use Blu-tak putty around bottom of Q-up, or similar, for added support.
Ted |
Just a follow-up to our earlier conversation regarding adjustments needed for the Q Up to work with the stock Pro-Ject Debut III turntable,
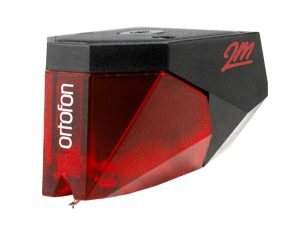
with the stock tubular steel tonearm, fitted with the stock Ortofon OM5E cartridge and stylus, using the stock felt pad on the platter, and playing standard thickness LPs from the last century (I tested this using an LP pressed in 1966).
As I mentioned earlier, the Q Up is too tall for its lift arm to fit under the tonearm. However, reducing the distance between the two horizontal splines on either side of the Q Up, and the Q Up’s bottom surface, will allow the splines to fit into the last set of grooves in the “U” shaped base. When installed in this manner, there will be enough clearance between the pad on top of the lift arm when it’s cocked, and the bottom of the tonearm. Please bear in mind that this will only work as long as the distance between the bottom, outside surface of the base, and the bottom groove on the inside of the base, remains as it is currently. I would strongly discourage trying to eliminate the base unit altogether, as it really is important for correctly adjusting the proper horizontal position of the trigger in relation to the tonearm.
To make mine work, I had to file about a mm or so off of the bottom surface of the Q UP, and also file enough material from the bottom, inside surface of the base unit, to provide the rest of the clearance needed. This allowed me to easily slide the Q UP into the last groove in the base. After installing it, there appears to be just a little over 1mm of space between the top of lift arm pad, and the bottom of the tonearm, when the lift arm is cocked.
Anyway, you did a hell of a job. It’s an elegant design, and it really works great!
Bob |
| I sanded the actual Q-up only (not the inside of the base unit) at least 1mm giving it the ability to sit in the base unit- touching the bottom (there is at least an additional mm after that). This should give all the clearance you need for the debut, it will also allow you to keep the foam on.
For filing I would suggest a fine sandpaper 500 and up, I personally used 800, it took about 5 Min and got a smooth nice finish.
All in all between removing the foam, sanding the bottom of the Q-up and the bottom of the base unit, you could squeeze at least 3mm maybe 3 1/2, which should allow you to use the Q-up with the base unit, on (probably) a bunch of other Turntables.
Thanks,
Aron. |
|


